Water Heater Maintenance Checklist: The Annual Routine
I'm Dan Reeves, a licensed master plumber with 20 years in residential work and more than 4,000 jobs behind me. Water heaters are the most neglected appliance in the house, and it is not close. The furnace gets a filter, the car gets oil, and the water heater gets ignored for a decade until it announces itself with a flood. The maintenance that prevents that takes one afternoon a year, costs almost nothing in parts, and is the single biggest factor in whether a tank dies at 7 years or 14. This is the exact checklist I run on my own heater and hand to customers.
I’m Dan Reeves, a licensed master plumber with 20 years in residential work and more than 4,000 jobs behind me. Water heaters are the most neglected appliance in the house, and it is not close. The furnace gets a filter, the car gets oil, and the water heater gets ignored for a decade until it announces itself with a flood. The maintenance that prevents that takes one afternoon a year, costs almost nothing in parts, and is the single biggest factor in whether a tank dies at 7 years or 14. This is the exact checklist I run on my own heater and hand to customers.
Quick answer: Once a year: flush the tank, test the T&P relief valve, confirm the temperature is at 120°F, and inspect the base, fittings, and venting for leaks or corrosion. Every 3 to 5 years, pull and inspect the anode rod. A pro visit for all of it typically runs $150 to $300; doing it yourself costs a garden hose and an afternoon.
What belongs on the annual water heater maintenance checklist?
Here is the whole routine in one table. Keep it, print it, tape it to the tank — I write the date on the jacket in marker at every visit so the next check is never a guessing game.
| Task | Frequency | DIY or pro | Why it matters |
|---|---|---|---|
| Flush the tank | Every 12 months (6 in hard water) | DIY-friendly | Sediment causes rumbling, overheating, and early tank death |
| Test the T&P relief valve | Every 12 months | DIY | A stuck valve is a safety hazard, not just a defect |
| Inspect the anode rod | Every 3–5 years (2–3 with a softener) | DIY or pro | The rod sacrifices itself so the tank does not rust |
| Check temperature setting | Every 12 months | DIY | 120°F balances scald safety, bacteria control, and energy |
| Inspect base, fittings, and drain valve | Every 12 months | DIY | Slow leaks and rust streaks are your earliest failure warnings |
| Check venting and flame (gas units) | Every 12 months | Pro if anything looks off | Backdrafting and soot mean combustion problems |
| Test the expansion tank (if fitted) | Every 12 months | DIY | A waterlogged expansion tank hammers the T&P valve and fittings |
Why is flushing the tank the most important task on the list?
Every gallon that enters your heater carries minerals, and heat drives those minerals out of the water and onto the tank floor. Over a year that becomes a sediment layer — sand and scale that insulates the bottom of a gas tank so the burner overheats the steel, and coats electric elements until they fail. The popping and rumbling you hear from an older tank is steam forming under that layer and collapsing. I explain the sound itself in water heater popping noise.
The flush itself is simple: power or gas off, cold supply managed, garden hose on the drain valve, drain until the water runs clear. I wrote the complete sequence, including the safety order that keeps you from burning out an element in an empty tank, in how to flush a water heater. One afternoon, once a year. If you do only one task on this page, do that one.
How do you test the T&P valve and check the temperature?
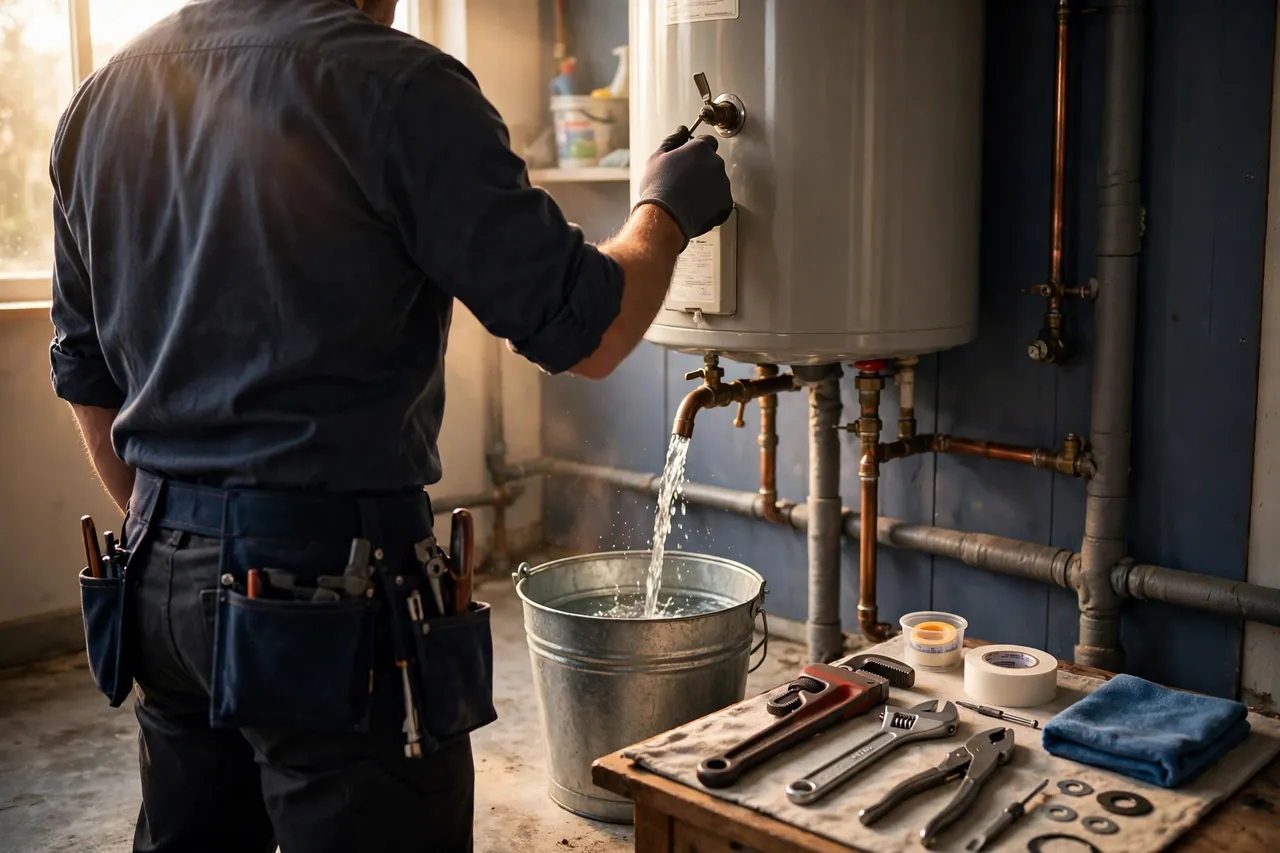
The temperature and pressure relief valve is the safety device that vents the tank if temperature or pressure ever runs away. A valve that has sat undisturbed for a decade can seize shut, and a seized T&P is the one failure on this list with real danger attached. Test it annually: bucket under the discharge pipe, lift the lever briefly, and confirm water flows and stops cleanly when you release it. A valve that will not flow, or that drips forever afterward, gets replaced — that is a $150-to-$350 pro job and not a watch-and-wait item.
While you are standing there, read the thermostat. I set residential tanks to 120°F. Hotter wastes energy, accelerates sediment and corrosion, and creates a genuine scald risk — water at 140°F can burn a child in seconds. Colder than 120 risks letting Legionella bacteria colonize the tank. 120 is the setting where safety and efficiency shake hands.
When should you check the anode rod?
The anode rod is a sacrificial metal rod hanging inside the tank that corrodes so the tank steel does not have to. When it is consumed, corrosion moves to the tank, and the countdown to a leak starts. Check it every 3 to 5 years — every 2 to 3 with a water softener, which eats rods faster — and replace it when more than about 6 inches of core wire shows or it has worn under 1/2 inch thick.
This is the highest-value line on the checklist, because the math is absurd: a standard rod costs $20 to $65 in parts, a pro swap $150 to $300, and the tank it protects costs $1,300 to $2,400 installed. My full guide to water heater anode rod replacement covers rod materials, the low-ceiling problem, and when a powered anode makes sense.
What should you look for on the leak and venting inspection?
Walk the tank slowly with a flashlight and dry hands. You are looking for rust streaks running down from fittings, green or white crust at the pipe joints, moisture or rust at the base pan, a drain valve that weeps, and — on gas units — soot at the draft hood, a lazy yellow flame instead of a steady blue one, and any sign the vent pipe has shifted or corroded. Run your hand under each fitting; your fingers find slow leaks your eyes miss.
Any water at the base deserves a diagnosis, not a towel. A fitting leak is a repair. A tank seam leak is a replacement, because tank steel cannot be patched — if water is coming through the tank itself, start with my list of the signs you need a new water heater and plan the swap before the leak plans it for you. And if you have an expansion tank on the system, thump it: it should sound hollow at the top. A tank that sounds full of water has a failed bladder and is quietly stressing every fitting in the system.
What tools and supplies do you need for the annual routine?
Almost nothing you do not already own. A garden hose long enough to reach a floor drain or daylight, a bucket for the T&P test, a flashlight, and a marker for dating the tank jacket cover most of the list. Add a flathead screwdriver for thermostat covers on electric units, and a basic socket set if the anode rod is due — the rod takes a 1-1/16 inch socket in most tanks, and I will save you the frustration: use a breaker bar, not a ratchet, because factory torque plus years of corrosion defeats small tools and rounds hex heads. Gloves and eye protection are not optional around hot drain water. Total investment if you buy everything new: under $75, once, for a kit you will use for the life of the house. Keep the hose coiled next to the heater and the checklist taped to the jacket, and next year’s routine takes half the time because nothing needs hunting down.
What about tankless water heaters?
Tankless units skip the tank tasks — no anode rod, no sediment flush of a storage vessel — but they are not maintenance-free. The heat exchanger needs descaling roughly once a year, more often in hard water, using a pump and a descaling solution or vinegar. The inlet water filter needs cleaning, the condensate trap on condensing models needs attention, and error codes should be read, not cleared and forgotten. I compare the ownership reality of both types in tankless vs tank water heater — the maintenance difference is one of the most underweighted parts of that decision.
How does maintenance connect to how long the heater lasts?
Expected lifespan is a range, not a date: tank heaters run 8 to 12 years, tankless 15 to 20-plus, and where your unit lands inside that range is substantially a maintenance story. I lay out the ranges by type and fuel in how long do water heaters last. The pattern after 20 years is unmistakable — the heaters that reach the top of their range are the ones somebody flushed and checked, and the early deaths cluster in houses where the heater was never touched.
When should you call a pro for water heater maintenance?
Call when the anode rod will not break loose, when the T&P valve fails its test or will not stop dripping, when you find soot, backdrafting, or a yellow flame on a gas unit, or when the leak inspection finds water you cannot trace to a fitting. A pro maintenance visit runs $150 to $300 — book it in a mild season and it is the cheapest insurance in your house. Everything else on this checklist is yours to do this weekend, and the heater will repay the afternoon for a decade.
Frequently asked questions
How often should you flush a water heater?
Once a year for most homes, and twice a year if your water is hard or your drain water runs sandy at the first flush. Sediment builds fastest in gas tanks where the burner cooks minerals onto the tank bottom, but electric elements foul too. In my experience a household that flushes annually almost never calls me about rumbling tanks, while the heaters I replace at seven years are nearly always ones that were never drained once. Put it on the same calendar anchor every year — I tell customers to pair it with changing the clocks or the furnace filter swap.
Does regular maintenance really extend a water heater's life?
Yes, measurably, and the mechanism is not magic. Flushing removes the sediment blanket that makes the burner or elements overheat the tank floor, and a live anode rod absorbs the corrosion that would otherwise eat the tank steel. A tank heater's expected life is 8 to 12 years, and the units I see reaching 13, 14, 15 years are consistently the maintained ones, while neglected tanks in hard-water areas regularly die at 6 to 8. Maintenance will not resurrect a dying tank, but it is the difference between the middle and the top of that lifespan range.
How much does professional water heater maintenance cost?
A professional maintenance visit typically runs $150 to $300, depending on what is included — a flush alone often prices around $200, and a visit that also pulls the anode rod and tests the valves lands at the higher end. Compare that to $1,300 to $2,400 for an emergency replacement on a Saturday, plus whatever the leak damaged on its way out. Many shops, mine included, will discount the maintenance visit when it is booked in a slow season. Ask in spring or fall, not during the first cold snap when every schedule is full.
What happens if you never maintain a water heater?
Nothing dramatic at first, which is exactly the problem. Sediment accumulates, efficiency slides, the tank starts popping and rumbling as steam bubbles collapse under the sediment layer, and the anode rod quietly depletes until the tank itself becomes the sacrifice. Then the failure arrives all at once: a leaking tank that cannot be repaired, on the heater's schedule, not yours. The maintenance I am describing costs an afternoon a year. Skipping it converts a planned $1,500 replacement into an emergency one with water damage attached.
Can I do water heater maintenance myself or should I hire it out?
A confident homeowner can do most of this checklist: flushing, testing the T&P valve, checking the temperature setting, and inspecting for leaks need a hose, a bucket, and care around hot water. I draw the DIY line in three places. Gas work — burner or venting problems — belongs to a pro. A seized anode rod that will not break loose with a breaker bar belongs to a pro before you twist a fitting off. And anything involving a valve that will not stop dripping after testing should be replaced, not watched. Everything else on this list is an afternoon well spent.